Showing posts with label Kuih. Show all posts

Monday, February 14, 2011

Kuih Bahlu 2 (Chinese Egg Sponge Cake, 鸡蛋糕)


I did a Pandan Kuih Bahlu before in year 2008 and never try it since.  Because I found the recipe a bit dry.  This year I had no plan on making kuih bahlu but while I was browsing and jumping blogs, I decided to check out Sinner's blog.  And then I saw her kuih bahlu recipe posted last year.  I quickly compared her ingredients with the one I made before and found that hers uses less sugar and flour and she also stated that hers produces soft kuih bahlu.  So, I got interested and prompted me to try out her recipe.  I was glad I tried because it is indeed soft and slightly chewy.  Edda and myself couldn't stop popping a few of this once it was cooled.  :-P  However, after I kept it in the container, it turned sticky and moist unlike the dry kuih bahlu we used to.  Almost like the mini egg sponge cake I did in 2007.  So, I don't think this can be kept long.  Guess I will have to play with the old recipe again, like adding oil.


Guess you have noticed the ugly looking kuih bahlu I have right?  I don't have the pretty kuih bahlu mould so I used the mini muffin pan to make this instead.  If you too don't own the mould and wanted to make this, check out my instruction on the next page.  The method is about the same but slightly different.  You can still enjoy the kuih bahlu without the mould.  I guess the next time I go back to M'sia, I need to buy myself two kuih bahlu moulds.


Recipe adapted from Sinner, from Kitchen Redneck.  Thanks Sinner!

Ingredients:

2 large eggs
60gm sugar
1/2 tsp, pure vanilla extract
60gm all-purpose flour
1/4 tsp. baking powder

Method:

1.  Beat eggs with electric beater until light and frothy, about 2 minutes.

2.  Add in sugar and vanilla.  Beat until thick and yellow, about 2 minutes.

3.  Add in sifted flour and baking powder and use a spatula to blend well.

4.  Preheat oven to 375'F.  Grease the mini muffin tin with cooking spray.

5.  Scoop batter by tablespoon into mini muffin tin evenly until it reaches the top, not too much.

6.  Bake for 5 minutes or until golden brown.  Take it out with a toothpick and cool on wire rack.

7.  Store in air-tight container when cooled.

Makes about 22 pieces.  Recipe can be double.

Friday, January 28, 2011

Brown Sugar Glutinous Rice Cake (Kuih Pulut Gula Hitam)


I made this Malaysian cake or kuih to bring to a friend's house.  I won't be sharing the recipe because I didn't make a good job of it.  The glutinous rice turned out too soft and I think I picked the wrong method to do this.  Since I made this without measurement, just estimation, I also found it not sweet enough.  Since lots of people know how to make this, I won't be telling you how.  Just that I added brown sugar and sweeten coconut flakes into the coconut fragrant glutinous rice before putting it into a container to shape.


Surprisingly my hubby liked it and I thought he hardly eat any Malaysian cake.  I would definitely try this again and this time with another method of doing it.  This cake is best eaten on the same day.  It is not recommended to put it in the refrigerator as this will harden the glutinous rice.

I tried to arrange it like a snowflake, haha... does it look like a snowflake?  :-P

Monday, December 20, 2010

Steamed Pumpkin Cake (Pumpkin Kuih)


My one pumpkin can help me create so many new dishes.  If you have been following my blog, I have been popping out all sort of pumpkin recipes recently, have you even noticing it?  And it's not over yet, I still have more pumpkin recipes to share.  Just stay tuned!

I love my stir-fry pumpkin with eggs, so yummy delicious and this steamed pumpkin cake, soft and moist and so well seasoned.  It's so great eating it this way, but I also like it pan-fried because I like the crispy crust on the outside before I bite into the softness inside.


I was so happy I created this recipe.  I never thought of making this kuih in the first place but once I found out that the defrosted pumpkin was soft in nature, I had to change my plan.  Since the soften pumpkin contained lots of liquid so I needed a recipe that suitable for this.  Once I planned on making this, I realized that I only had 100g of rice flour, no more and no less, so I had to create a recipe based on 100g of rice flour.  Luckily it turned out so well and delicious.

This recipe is not hard to make at all.  If you try it, feedback to me ya! ;-)


Ingredients:
 
100g rice flour
50g wheat starch (Tang Mein Flour)
2 1/2 cup hot water

300g pumpkin ( I used frozen and defrosted), divided (take one piece and cut into tiny pieces, reserved for stir-frying, optional step)
4 Chinese mushroom, soften in hot water, drain, cut into tiny pieces
1/4 cup dried shrimps, soften in hot water, drain
2 shallots, minced
2 scallion, only the white part, chopped
A little salt and sugar

(A)
1 tsp. salt
1 tsp. chicken powder
1 Tbsp. sugar
1/2 tsp. 5 spice powder
Dashes of pepper
1/2 tsp. sesame oil

The shape of my electric steamer bowl.  Thus, the shape of my pumpkin kuih.  :-)


Method:

1.  Heat up a wok, add a little oil.  Add in shallot, white part of the scallion, stir-fry until fragrant.  Add in dried shrimps, mushroom and pumpkin.  Stir-fry until fragrant, season with a little salt and sugar.  Dish out and set aside.

2.  If you use frozen and defrosted pumpkin, the pumpkin is already soft.  So, just process it in a food processor until fine.  If use fresh pumpkin, steam it for 30 minutes until soft and mashed it.  Set aside.

3.  In a large bowl, add in rice flour and wheat starch, whisk well.  Add in hot water and stir-well.  Add in the processed/ mashed pumpkin, the stir-fried ingredients in 1 and season it with (A).  Stir well together.

4.  Pour into a steaming bowl or container (spray it with oil first) and steam in high heat for 45 to 60 minutes.  Depending on the size of your container.  

5.  Once done, take it out, give it a little shake to loosen the edges and turn it out to cool completely.  It will harden a little when cool and easier to cut.  Keep leftover in the refrigerator.  Heat it up in a microwave or pan-fry it to serve.

6.  Serving suggestion:  Cut into pieces, top with chopped green onion, crispy fried shallot and Sriracha chili sauce.

Thursday, September 16, 2010

Indonesian Cantik Manis Kuih


When I saw this recipe at Indonesia Eats's blog, I knew I had to try it.  It looked so pretty in hers as her colorful tapioca pearls retained its color when cooked.  Mine the color seem to be disappeared during the cooking process.  It only has a light tint of green but can't even see it from the pictures.

The reason I wanted to try it is because I have a packet of Korean green bean starch in my pantry and the rest of the ingredients.


This dessert received rave reviews from my hubby and daughters.  They simply loved it.  Just be careful when you stir in the green bean starch, make sure that it is dissolved completely and no lumps present.  If you see lumps, don't scoop it into the mold to cool as it won't be edible.  I let mine harden in the refrigerator and store it in the refrigerator as it is made of coconut milk.  Anything made using coconut milk turns sour easily so remember to store it in the refrigerator.


I am submitting this dish to Indonesia Eats for her CSN store giveaway.


Recipe adapted from Indonesian Eats.

Ingredients:
  
100 g colourful sago/tapioca pearls   
50g Korean green bean starch
500ml coconut milk  
¼ tsp. salt 
90g sugar
  
Konnayaku jelly mold, or any mold you have

Methods:
 

1. In a boiling water, add tapioca pearls and cook for 10 minutes and then off the heat, cover and let it sit for 15 minutes or until transparent and strain.
 
2. Dilute green bean starch with some parts of coconut milk and set aside.

3.Boil remaining coconut milk with salt, then add green bean starch mixture and stir. Add sugar, stirring until the sugar is dissolved. Add sago pearls, stir well and remove from heat.
 
4. Pour the mixture into molds. Leave to cool in the refrigerator. Unmould the cakes and serve.

Friday, July 9, 2010

Red Bean Mochi Cupcakes


I first heard about mochi cake through A Food Lover's Journey.  I looked through the recipe and it is a lot like the baked nian gao that I did for Chinese New Year except probably half the recipe called for.  It is an interesting idea to bake it in cupcakes and I wanted to give it a try.  Since I love red bean flavor and have some red bean paste on hand, I made mine into a red bean mochi (glutinous rice) cupcakes.


It tasted like "kuih" (a Malaysian cake), soft, sticky and slightly chewy with red bean flavor.  You can certainly substitute the milk with coconut milk to make it richer. This recipe of mine stays soft even after three days in a container.  Best eaten within three days, might go bad after that. One thing to note though, the paper will be hard to unwrap on the first day it was baked, but easier on the second day onwards.

You can buy the red bean paste in a can at the Asian grocery stores in the U.S. for those who are interested.  Feedback to me when you try this red bean mochi cake.  I had made it twice and loved it!


~Yield about 12-18 cupcakes (about half of the normal paper cup size), depending on the cupcake paper size and how much batter you add.

Ingredients:

2 eggs
1/2 cup sugar
1/2 cup oil
1 1/4 cup milk
1 tsp. baking powder
200g red bean paste (sweeten) from a can
200g glutinous rice flour (about 2 cups)

Method:

1.  In a big mixing bowl, add in eggs and sugar.  Use a hand whisk or electric whisk and whisk until light and well mixed, sugar dissolved.  

2.  Add in oil and milk, hand whisk until combine.

3.  Stir in baking powder and red bean paste, whisk until smooth.

4.  Lastly, add in glutinous rice flour, whisk until well incorporated.  The batter will be watery so don't have to be alarm.  Use a soup ladle and fill the paper cup almost to the rim.  The cake will sink down a little after you take it out of the oven.

5.  Bake in preheated 350'F oven for 20-25 minutes or until tooth pick inserted in the center comes out clean.  Cool on wire rack and store in air-tight container.

Saturday, July 12, 2008

Pandan Kuih Bahulu (or Kuih Bahlu)


I bought a light non-stick kuih bahlu pan at my recent trip back in Malaysia. This was not the traditional heavy kuih bahlu pan because I certainly wouldn't want to carry those. Since I got the pan, I wanted to test out the pan and I found the kuih bahlu recipe at Rainbows. I added pandan paste into mine because I was curious of how it would taste like. In my first batch, I sprayed the pan with some butter spray and all the pattern disappeared. So, I learned a lesson there. I didn't spray on my second batch and above was what I got. The pattern was not as clear cut because the indentation in the pan was not deep compared the the traditional mold.

Since I have not eaten any store-bought kuih bahlu or any kuih bahlu made with the mold for ages, I couldn't tell how this was. Thus I purposely made this to bring to my friend's house and let them be the judges. According to the hubby, it's better than store-bought and it was pretty good, he said the store-bought one was really dry. According to the wife, it's still a bit dry compared to the one her MIL made. I thought it was kind of chewy. How is it supposed to taste like huh?

Update: I did some research on the web and the texture of kuih bahulu is supposed to be dry, crispy outside and slightly spongy inside and best eaten with coffee/tea because of it's dry texture.


Ingredients: [Recipe from Rainbow]

3 large eggs
175 g castor sugar
1/2 tsp. vanilla essence
175g plain flour
1/4 tsp bicarbonate of soda

First I sifted the flour with the bicarbonate of soda and leave it aside. I then beat the eggs in an electric beater til frothy. sugar is then added slowly while beating the eggs til mixture is pale and thick. I then add in the vanilla essence and gently fold in the flour in 3 to 4 batches. Do not over mix. I then use a spoon to fill up the batter in a lightly greased kuih bahulu moulds. Fill up to the surface level.

Bake it in preheated oven at 200 degrees C for 12 - 15 minute or til golden brown. Removed the bahulu from moulds and cool on a rack before storing in container.

Sunday, February 24, 2008

Steamed Pandan Cassava Kuih


I made this for a party and it was well received.  I was thinking instead of the baked cassava kuih that we were used to, I wanted to try a steam version.  The steamed version was not bad too and easy to make.  You can also make this with gula Melaka/ palm sugar for a different fragrant, color and taste instead of using pandan paste.


Ingredients:


1 packet/ 1 lb./ 16z./ 454gm of grated tapioca/ cassava
3/4 cup white sugar (or palm sugar for different taste and color)
4 Tbsp. tapioca flour
1 1/4 cup coconut milk
1 tsp. pandan paste


Method:


1.  Drain the cassava or squeeze dry.

2.  In a big bowl, add in all the ingredients, mix well and pour into a greased pan and steam for 25 minutes.

3.  Let cool before slicing into pieces.

Sunday, February 17, 2008

Baked Red Bean Nian Gao


I decided to make this red bean nian gao to bring to Lily's party and to serve at my party. This recipe was shared by Lin, and it is so worth a try. Thank you Lin for sharing this fantastic recipe. :*


This is seriously good. Tasted so much better with the added red bean, I will make this again next year. Oh yeah, have you spotted my mistake yet? I forgot to swirl the red bean paste around the batter when I dropped it in and thus some part had red bean while other didn't. Not pretty too but look can be deceiving! ;) Anyway, I learned from my mistake.

Wednesday, November 7, 2007

Mini Egg Sponge Cakes


Mini sizes and cupcake sizes.

I love kuih bahulu (or as my mom called it kuih bahlu) and always wanted to make it but just didn't have enough push to really do it. Then, I saw this mini egg sponge cakes recipe from Hut of Cranberry's blog and according to her, it tasted just like kuih bahulu, so I guess that did it. All I needed was her pictures to convince me to get baking! So, I made it! I followed her sugar amount 80g and it turned out just nice, not too sweet and Evy ate 1.5 cupcake sizes and a few mini ones at one go.


Mini sizes.

I guess this little cupcakes is healthier since no butter or oil is used in the recipe. Or is it an illusion to seduce my mind to eat more? Especially when I baked it in the mini cupcake sizes, one is nothing at all, can't even get the satisfaction out of it. Need at least a handful, perhaps that's why Evy ate so much?


Soft and nice, not to say fragrant too!

So, if you like egg sponge cakes or kuih bahulu, do give this recipe a try! Just remember to beat your egg mixture until pale and thicker in consistency or when you write an 8 on the batter it will be visible for 10-15 seconds before adding in the flour. Notice that I used paper cups? Either this or grease your pan well. :)

Monday, September 10, 2007

Green Tea Daifuku/ Mochi


Daifuku is a Japanese sweet consisting of a small round glutinous rice cake/mochi stuffed with sweet filling. Most Daifuku are covered in a fine layer of corn or taro starch to prevent them from sticking to each other, believe me this is one sticky dessert without the flour. I adapted my Green Tea Daifuku from Hugbear aka LeeLee and used the basic red bean paste as filling. I have tried it plain with toasted ground peanuts before and it was yummy as well.


Recipe adapted from LeeLee:

1 cup glutinous rice flour
1/2 tsp. green tea powder (for baking)
180ml water
1/4 cup sugar

Red bean paste for filling
Cornstarch for dusting (microwave cornstarch for 2 mins, let it cool completely before using)

Method:

1. In a glass bowl, combine flour, green tea powder and water. Stir to mix well. Then add in the sugar, stir til sugar dissolved.

2. Cover with a plastic wrap and microwave for 2 minutes. Remove and stir well. Return to microwave for another 30 seconds. Stir-well and check for doneness. If not, put it back for another 30 seconds, be careful not to burn it.

3. Flour the working surface with cornstarch and use a spoon to drop a ball of mochi on top and quickly cover it with starch. Divide into 8 or 10 pieces. Wrap the filling inside and cover with more cornstarch. Shape into balls and ready to serve.


Verdict: This daifuku is really soft with a strong green tea flavor and combined with the sweet red bean paste, what can I say but absolutely divine!

Saturday, July 21, 2007

Chinese Rice Bowl Pudding


A good friend of ours came by on Saturday and I decided to make him a treat. I made this Chinese rice bowl pudding that looks like chwee kuih but actually it's a wah kuih. First time trying this and glad that it turned out well and my guest said it's very good. :)


I used Gina's Wah Kuih recipe. The differences I noticed between wah kuih and chwee kuih are for the pudding, wah kuih has wheat starch in it and thus making it more chewy/bouncy in texture as opposed to soft. Also, wah kuih has more ingredients in filling as opposed to just chai por. Before this, I have not heard of wah kuih.


As for my filling, I added dark soy sauce and sugar when stir-frying. Also drizzled some Sriracha hot sauce for extra spiciness. I didn't bother to steam the filling with the rice pudding together (lazy me as you know!), therefore it might look more like a chwee kuih.

Stay tuned for what I did with the extra rice cake. ;) Or you would love a guess?

Sunday, February 25, 2007

Steamed Huat Kuih


My first huat kuih and I cheated by using Redman Huat Kueh Mix.


I added Pandan extract to one. Yellow coloring plus banana essence to the other and lastly just red coloring. "Swee bor?" (pretty or not?) :)


This is how the package looks like. It comes in this multi-colors one and the other is brown sugar only. Ingredients stated in the package are flour, sugar, baking powder and vanillin. All I need to add is water or coconut milk. Very easy! One package yields 12 small huat kuih.

I got one easy recipe for you to try. It's FenYing's Xiao Fa Gao recipe. Since all the ingredients can be found at home, why pay so much for a premix? I bought it earlier because I didn't know it's so easy to make. :P

Edit to add 02/27:
My conclusion: Use Gula Melaka for extra fragrant. If you want to make this colorful ones (more appealing to kids), use essence in addition to coloring (it tasted so much nicer). I thought of this while laying in bed:

~White color, add Coconut, Lychee or Almond essence.
~Green color, use Pandan extract or green tea powder.
~Yellow coloring, add Banana or Mango essence.
~Red coloring, add Strawberry, Raspberry or Rose essence
~Orange coloring, add orange essence.

Saturday, September 9, 2006

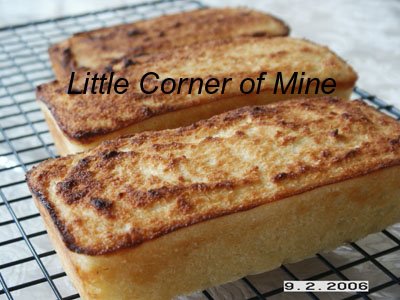
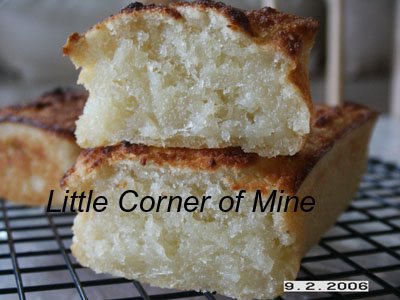
Cassava Kuih


Made this cassava kuih (kuih bingka ubi) using adapted Agnes Chang's recipe.


This recipe has the rough texture and thus you can taste the cassava in it. I used the frozen grated cassava easily available in the frozen section at asian grocery stores. I have changed this recipe into cups measurement. 


Ingredients:


1 packet frozen cassava (16oz)
3/4 cup sugar
1/2 cup thick coconut milk
1 egg, beaten
1/4 cup melted butter
1/4 tsp. salt
1/2 tsp. vanilla essence


Method:


1. Line a small loaf pan with parchment paper at bottom. Spray the bottom and sides of pan with cooking spray.


2. Mix all in a bowl. Pour into lined baking tin.


3. Bake in a preheated oven at 375'F for about 40-45 minutes. Then broil it for 3-5 minutes or until the top is slightly toasted and brown.


4. Remove and leave to cool completely before cutting into pieces.

Tuesday, August 29, 2006

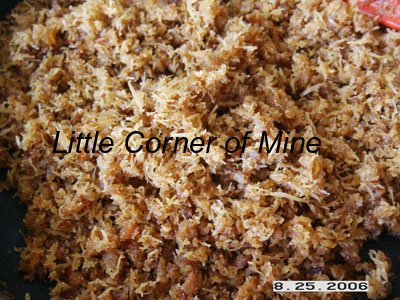
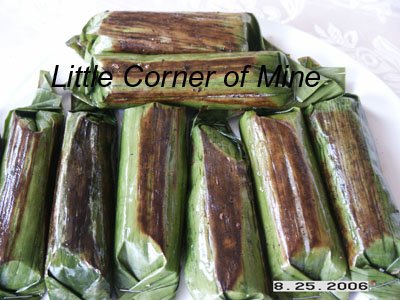
Rempah Udang

This is my favorite kuih in M'sia. I have been wanting to make this kuih for years, but just never got to. Why I finally made it you asked?

Because I made some sambal haebee two days ago and I have the frozen shredded coconut and banana leaves in the freezer just ready for me to use. So, why not just make it and satisfy my craving. So, here it is! :)


This is my short-cut filling. I used my sambal haebee, added the toasted shredded coconut and some coriander powder, pan-fry to mix well.


Steamed my glutinous rice with coconut milk and a little salt.


Wrapped in banana leaves and stapled it. Pan-fried in greased non-stick pan until toasted and fragrant.


Finished product!


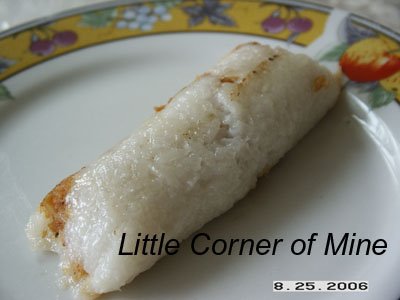
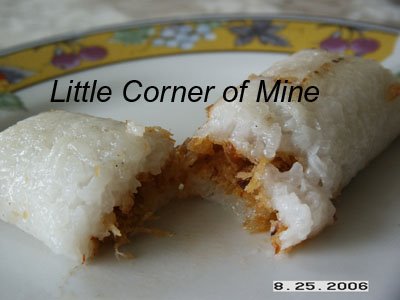
Closed up of what the inside looks like! A bit spicy because of my spicy sambal haebee. :P


Rempah Udang Recipe from At Home with Amy Beh Cookbook
--------------------------------------------------------------------------
100g small prawns, shelled
100g grated white coconut, roasted and ground
1-2 Tbp. oil

Blend spices:
4 shallots
2 cloves garlic
1 lemon grass, finely sliced
1 candlenut
1.5cm cekor
1/2 tsp. chilli paste
1 tsp. coriander powder

Seasoning:
1/4 tsp. salt
1/2 tsp. sugar
Dash of pepper

Rice Mixture:
300g glutinous rice, washed and soaked overnight
1 1/2 cups thin coconut milk
1 tsp. salt
1 tsp. sugar

2 banana leaves, scalded, wiped dry, and cut into 15x8cm pieces

Method:

Chop prawns finely. Heat oil in a kuali and fry ground ingredients mixed with chilli paste and coriander powder until fragrant. Add prawns and stir fry till cooked. Mix in roasted coconut and seasoning. Stir well until ingredietns become dry and golden brown. Set aside.

Combine glutinous rice with coconut milk, salt and sugar, steam for 25-30 minutes or until cooked. Remove from steamer and leave to cool.

Take a tablespoonful of the cooked glutinous rice and spread it thinly in the centre of a banana leaf. Add 1 tablespoon of filling over. Top with another tablespoon of rice. Roll up neatly and secure ends with toothpick or staples. Brush rolls with a little cooking oil. Grill for about 15 minutes. Turn the rolls round occasionally.

Note:
Sorry I thought the recipe in her cookbook will be in kuali.com. Since it's not, I typed it here for those who requested. But bear in mind, I didn't use her recipe, but her recipe is a guide for those who wants to make it.

Thursday, February 9, 2006

Baked Nian Gao

I just love nian gao, either baked or steamed. Of course if I have to make it myself, I would prefer an easy recipe. Got this nian gao recipe from Lin, courtesy of her co-worker. But no clue why mine looks so different from her. I did omit the red bean paste, perhaps that's why my nian gao is so flat.


I also added Gula Melaka into the brown sugar and baked it in my new convection oven. Since my convection oven automatically lower the temperature to 325'F, it also took longer to bake. I ended out baking mine for 65 mins. The top is crusty brown and inside is soft and a little chewy. The sweetness is just nice and overall I like it. See that big slice on top, I ate two of those!!

Haven't pan-fry it with egg batter yet. Will see how long it keeps and whether the texture will be different as the days go by.

Oh, next time I would probably use 2 smaller pans to achieve the height that I want.


Recipe:
Baking Temperature ~ preheated 350°F / 180°C oven
Ingredients:
1 lb (500g) glutinous rice flour
2 ½ cup milk
3 eggs
1 cup vegetable oil
¾ cup brown sugar
¾ cup sugar
½ can (15 oz) red bean paste
Method:
1. Grease a 9 x 13-in pan. Set aside.
2. Combine all ingredients, except red bean paste.
3. Beat the mixture with a beater, mixing well.Pour ¾ of the batter into the prepared tin.
4. Bake for 10 minutes. Remove pan from oven, put spoonfuls of red bean paste all over the baked batter.
5. Cover the remaining ¼ of the batter on top of the red bean paste & continue to bake for 60 minutes.

Tuesday, November 15, 2005

Gina's Yam Kuih

Image hosted by Photobucket.com

I made Gina's yam kuih yesterday. You can get the recipe at Kitchencapers under Asian steamed kuih.

Image hosted by Photobucket.com

After it was pan-fried in the morning.

Verdict: It was a bit dry and hard to me. Thus I pan-fried it in the morning. Definitely tasted better as the oil gave it some moisture. Good with chilli sauce.


Recipe courtesy of Gina: (it's a direct copy and paste of her own words)


Ingredients:
600 g yam(steam and mashed)
400 g yam(cubed, then steamed)

Batter mix:
400 g rice flour
40 wheat starch
1 tbsp sugar
1 tsp salt
900ml Boiling hot water

Filling:
150 g dried shrimps(soften with water, diced)
10 chinese preserved mushrooms(soften, sliced thinly)
300g pork belly(blanched in hot water for 1 min, then cut into thin shred) 1/2 tbsp salt
3 tbsp Fish sauce
1.5 tbsp sugar
1 tsp pepper

Method:
1. in a wok, add 2 tbsp of cooking oil, stir fry dried shrimps till fragant.
2. add pork shreds to fry till cooked. Add mushrooms and rest of seasonings.
3. Stir fry for 3 mins. Set aside
4. In a pot, add hot water and batter mix flour. Do not turn on Fire yet!!Stir to dissolve. Mixture looks like milk.
5. Add mashed yam and stir to mix
6. Add filling ingredients and cubed yam
7. Stir to mix everything evenly
8. Turn on low heat/fire. And stir continously until batter is dry and sticky
9. Brush a round pan with onion oil and pour yam paste into it.
10. Flatten with a spatula.

To Steam using wok:
1. make sure wok is already hot and ready for steaming.
2. Place pan of yam kueh to steam over high heat for 30 to 40 mins.
3. Remove to cool and sprinkle with chopped spring onions and fried onions.

To Steam using a Microwave oven:
1. Fill yam paste in a casserole dish.
2. Spray water on top of the paste till its wet.
3. Pour 1 cup of water into the rotating tray.
4. Cover the casserole and Microwave on HIGH(100%) for 10 mins.
5. Continue to MW on MED(70%) for another 5 mins.
6. Remove and garnish with spring onions and fried onions.

To serve:
1. Wait for it to be completely cooled before slicing.
2. When its hot(just out of steamer), its too soft to be cut.
3. Serve with chilli sauce or sweet sauce or just freshly cut chilli.

Wednesday, March 23, 2005

My First Angku Kuih


Ahhh...finally made some angku kuih just now using the leftover mung bean paste. I used Amy Beh's recipe and it was all right. I just had the trouble to imprint the word in the middle of the angku. I'm going to put it in the refrigerator and pan-fry it tomorrow. Oh, I didn't put enough red coloring as well, as mine turned out to be orange angku. Also the skin texture is a bit too hard at the bottom, like not fully cooked. Don't know what's wrong with that. *sigh*