Showing posts with label Snack. Show all posts

Saturday, July 16, 2011

Lazy Egg Tarts


When I saw this egg tarts made using puff pastry at Nasi Lemak Lover's blog, I immediately bookmarked it.  Simply because I am lazy and simple or short-cut recipes attract me.  Just so that I had a piece of frozen puff pastry waiting to be used and my girls and I loved loved egg tarts (in any crust), so this recipe came in the right moment.  Each of us had three pieces after it came out of the oven and it was pretty good for a short-cut recipe.  However, I would prefer to use the pie crust for this instead of puff pastry the next time as it couldn't hold lots of filling as I was having difficulty in stretching the thawed puff pastry to fill the muffin hole.  

I would use the custard filling recipe again and make my own crust the next time I feel like eating egg tarts.  Definitely not a bad way to get a quick fix.  However, I would recommend the refrigerated pie crust instead of frozen puff pastry if you don't want to make your own crust and want a quick craving fix..


I saw the recipe at Nasi Lemak Lover and she adapted it from Forbidden Garden.

Ingredients:

Egg custard filling:

240g hot water
100g coarse sugar ( I used 90g granulated sugar)
3 eggs
¼ tsp vanilla extract
¼ tsp white vinegar (I used rice wine vinegar)

12pcs frozen square puff pastry, thawed (I used 1 piece of puff pastry, cut into 12 pieces) 


Method:

1. Dissolve sugar in hot water, set aside to cool.
2. Break eggs in a mixing bowl, lightly stir.
3. Add in syrup (no 1), vanilla extract and vinegar, lightly stir well to combine.
4. Sift twice, set aside.
5. Divide the puff pastry into 12 pieces and arrange it in a 12 holes muffin pan.
6. Pour egg custard filling in the puff pastry case, about 90% full.  I have some leftover filling which I just pour into a ramekin and bake together with the egg puff pastry.
7. Bake at pre-heated oven at 350'F for 35mins or till golden brown.
8. Remove from oven and leave to cool.

Monday, May 9, 2011

Spicy Sardine Puff Pastry


It is not a bad idea to keep some puff pastry in the freezer when it goes on sales.  It can make for a really quick snack or emergency finger food or appetizer.  Not a bad idea to have few canned of tomato sardine in the pantry for cases like this as well.  I always loved the spicy sardine filling, it was a flavor that I grew up loving and still love.  Too bad Evy didn't like the sardine filling, so Edda and I had most of it. :-P


This is one snack that is really easy to make with the frozen puff pastry.  You can get creative with all sort of fillings that you could imagine.  For example, curry chicken with potato, tuna, apple, kaya, red bean paste, nutella, cherry, strawberry, char siew, etc.  As long as you can imagine it, you can make it!


Ingredients:

1 sheet of frozen puff pastry, thaw in room temperature for 40 minutes.
1 egg + 1 tsp. water for egg wash

Sardine Filling:
1 small canned of tomato sardine, drain
1 big shallot, minced
1 Tbsp. key lime juice
1 Tbsp. ketchup
2 Tbsp. Maggi sweet chili sauce


1.  Cut the thawed puff pastry into 9 square pieces.  Mix the filling ingredients into a bowl.  Use a small roller and roll the puff pastry into a slightly bigger square, fill in the filling and seal it with a fork, like picture above.


2.  Brush the top with egg wash.  Bake in preheated 400'F oven for 15 minutes or until golden brown.


But OOPS!!  Why my filling came out during baking?  But never mind, let it cool and just stuff the filling in using a teaspoon.  Do you think is because I put too much filling?  Because I thought I sealed it pretty well.


Wednesday, March 23, 2011

Cilantro Walnut Pesto & Alexia Fries


I made this Cilantro Walnut Pesto for years.  You can see it from my old post here.  I realized that I haven't exactly really shared my pesto recipe, so I would share it now.  When walnut was on sales, I bought one big bag and kept it in the freezer.  So, I would have walnut on hands if I wanted it in making cookies, cake, or pesto.  Very convenient!  I added tuna in water into my pesto for added nutrient.  I also added a side of sweet potato fries to make it complete.


As part of the Foodbuzz Tastemaker Program, I received a free coupon to sample the Alexia product.  I wanted to try the Caroline BBQ Sweet Potato Fried initially but it was not carried in the supermarket I went to.  So, I ended up picking this Sweet Potato fries.  Alexia premium foods are all natural, delicious and free of trans fat.  You can pick from appetizer, side dishes or bread.  It is a great way to bring outstanding gourmet flavor straight from the freezer to the table in just minutes.  I tasted the sweet potato fries, I got to say it tasted just liked my homemade sweet potato fries.  I sprinkled with some Paprika before baking, but I should have used cayenne pepper because I was hoping for a little spiciness.  It was slightly crispy and the sweet potato was sweet.  If you were too busy to prepare from scratch, this all natural Alexia frozen products could be a good alternative.


Ingredients:

1 box of 16 oz spaghetti
3 pouches of premium light tuna in water (2.5 oz each)
1 Tbsp. of butter (you can use more to suit your taste)
3 huge tablespoons of my cilantro walnut pesto
My homemade rice wine (you can use white wine)
Salt and pepper to taste (optional)

Method:

1.  Cook spaghetti as package instruction.  Drain in cold water and set aside.

2.  In a frying pan, add in spaghetti, butter, pesto and tuna.  Use two forks to mix it well together.  Sprinkle with some rice wine or white wine of it started to stick to the pan.  Stir quickly to mix well.

3.  Serve on plate along side with salt and pepper.  Season to taste based on your personal taste.


Cilantro Walnut Pesto:

1 bunch of cilantro, wash it clean and cut off the bottom part of the stems
6-8 gloves of garlic, depending on how strong you like the garlic taste
1/2 cup of walnut, lightly chopped
Extra virgin olive oil as needed
Salt, black pepper and sugar to taste

In a food processor, add in garlic and walnuts, process until fine.  Add in cilantro in two batches.  Process until fine.  Pour in the extra virgin olive oil until your desired pesto consistency.  Season with salt, black pepper and sugar and process again.  Keep this pesto in a glass bottle and keep in the refrigerator.  You can use this for your pasta, poultry and even seafood.

Wednesday, March 9, 2011

Fried Nam Yu Crackers

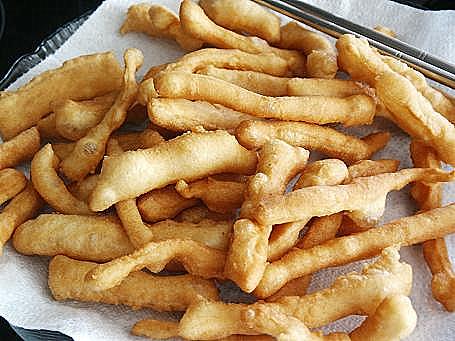
Below was my failed attempt at making a crispy cracker for "Yee Sang".  I didn't roll it thin enough and thus it turned soft when cold.  I took some when still warm and added it with some sugar for my girls to snack on.  They loved it because it was just like fried bread with sugar.  It was good if you eat it right away.  It was crispy and soft when warm.
 
 
My girls said it's tasty!

I thought I roll it thin enough but apparently not.  I should roll this again as thin as wonton skin. 

I cut and then stretched it and placed it on a slipat ready to deep-fry.


It expanded while deep-frying.

Now, what to do with this batch that already cooled down and turned soft?

It would be a waste to throw this away.  I did reuse it in my "yee sang"  when the spring roll cracker turned soft when mixed in the yee sang with the sauce (too thin you see).  So, I took this out and toast them in the toaster oven to crisp them up again.  Luckily it worked just fine.  Next time I won't be trouble myself to make this and would use the wonton wrapper instead. 


Wednesday, February 16, 2011

Fried Nian Gao and Sweet Potatoes with Spring Roll Wrapper


An interesting new way to serve nian gao that I noticed this year.  I was eager to try it and I did.  I saw a friend did a deep-fried nian gao with spring roll and she said it was delicious.  But I bought a sweet potato to go with my nian gao already and thus I wanted to incorporate the sweet potato into this spring roll.  Then, I saw another similar post while blog hopping.  That blogger used smashed steamed taro mixed with coconut flakes to wrap the nian gao and rolled it in the spring roll wrapper before deep-frying.  So, that was my "aha" moment.  I can steam and then smash my sweet potato before wrapping it with the nian gao and spring roll wrapper.  The idea was set and I got to work and the resulted product was really crispy and delicious.


I used the steamed nian gao that I did earlier.   The verdict of this nian gao is not what I was hoping for.  I wanted one that would melt when deep fried but this one was not.  It is not as fragrant too maybe it was because I didn't use the palm sugar but the Chinese bar sugar instead.  Therefore the color of this nian gao is not as dark brown.  Overall, it was an okay recipe, definitely not the best.  But I would try it again with palm sugar just to see whether it will have any difference (just want to experiment :-P).


This rectangle one only has a piece of nian gao.  This will stay crispy as there is no water from the sweet potato to soften the fried spring roll.


Direction:

1.  Cut the sweet potatoes into smaller pieces and steam for 25 minutes or until soften when poke with a fork.  Take it out and smash it with a fork.  Set aside to let cool.

2.  Take out the nian gao and cut it into log shape pieces.

3.  Prepare a bowl of water.  Take a piece of spring roll wrapper and place some smashed sweet potato on top like the above picture.

4.  Place a piece of nian gao in the middle.  Brush the sides of the spring roll wrapper with water.  Fold and roll it into a roll.  Finish the rest.

5.  Deep-fry in batches in medium heat oil until golden brown.  Dish out and drain on paper towel to absorb the excess oil.  Serve!

Note:  You can keep the leftover in a container in the refrigerator.  Just toast it again in a toaster oven before serving (about 5-6 minutes).


Tuesday, December 21, 2010

Pumpkin Tang Yuan or Pumpkin Glutinous Rice Balls


Happy Solstice or Dong Zhi “冬至节”everyone!  Today is the first day of winter and in tradition, Chinese eat Tang Yuan and reunion meal on this day.  This year I made a pumpkin tang yuan or pumpkin glutinous rice balls.  I used the leftover dough from making the Chinese Pumpkin Sesame Cakes to make this.  I will show some before and after pictures in the next page.

At first I thought of serving it in a thick sweet syrup but later changed my mind and served this in my Red Bean and Black Glutinous Rice Sweet Soup.  Just have to make it sweeter as the tang yuan is plain. 


A nice bowl of tang yuan to warm you up!


Shape it into small balls with your palm, I don't have exact recipe, basically mashed pumpkin mixed with glutinous rice flour.


Then, drop in batches in boiling water until it floats on top.  Dish out and put them in cold water.  Preferably, add some glutinous rice balls in a bowl and then top with red bean and black glutinous rice sweet soup to serve.  You can add a dollop of coconut cream to fragrant it up if you like.

ENJOY!!

Monday, December 20, 2010

Steamed Pumpkin Cake (Pumpkin Kuih)


My one pumpkin can help me create so many new dishes.  If you have been following my blog, I have been popping out all sort of pumpkin recipes recently, have you even noticing it?  And it's not over yet, I still have more pumpkin recipes to share.  Just stay tuned!

I love my stir-fry pumpkin with eggs, so yummy delicious and this steamed pumpkin cake, soft and moist and so well seasoned.  It's so great eating it this way, but I also like it pan-fried because I like the crispy crust on the outside before I bite into the softness inside.


I was so happy I created this recipe.  I never thought of making this kuih in the first place but once I found out that the defrosted pumpkin was soft in nature, I had to change my plan.  Since the soften pumpkin contained lots of liquid so I needed a recipe that suitable for this.  Once I planned on making this, I realized that I only had 100g of rice flour, no more and no less, so I had to create a recipe based on 100g of rice flour.  Luckily it turned out so well and delicious.

This recipe is not hard to make at all.  If you try it, feedback to me ya! ;-)


Ingredients:
 
100g rice flour
50g wheat starch (Tang Mein Flour)
2 1/2 cup hot water

300g pumpkin ( I used frozen and defrosted), divided (take one piece and cut into tiny pieces, reserved for stir-frying, optional step)
4 Chinese mushroom, soften in hot water, drain, cut into tiny pieces
1/4 cup dried shrimps, soften in hot water, drain
2 shallots, minced
2 scallion, only the white part, chopped
A little salt and sugar

(A)
1 tsp. salt
1 tsp. chicken powder
1 Tbsp. sugar
1/2 tsp. 5 spice powder
Dashes of pepper
1/2 tsp. sesame oil

The shape of my electric steamer bowl.  Thus, the shape of my pumpkin kuih.  :-)


Method:

1.  Heat up a wok, add a little oil.  Add in shallot, white part of the scallion, stir-fry until fragrant.  Add in dried shrimps, mushroom and pumpkin.  Stir-fry until fragrant, season with a little salt and sugar.  Dish out and set aside.

2.  If you use frozen and defrosted pumpkin, the pumpkin is already soft.  So, just process it in a food processor until fine.  If use fresh pumpkin, steam it for 30 minutes until soft and mashed it.  Set aside.

3.  In a large bowl, add in rice flour and wheat starch, whisk well.  Add in hot water and stir-well.  Add in the processed/ mashed pumpkin, the stir-fried ingredients in 1 and season it with (A).  Stir well together.

4.  Pour into a steaming bowl or container (spray it with oil first) and steam in high heat for 45 to 60 minutes.  Depending on the size of your container.  

5.  Once done, take it out, give it a little shake to loosen the edges and turn it out to cool completely.  It will harden a little when cool and easier to cut.  Keep leftover in the refrigerator.  Heat it up in a microwave or pan-fry it to serve.

6.  Serving suggestion:  Cut into pieces, top with chopped green onion, crispy fried shallot and Sriracha chili sauce.

Tuesday, November 30, 2010

Chinese Pumpkin Sesame Cakes


I saw this Pumpkin Sesame Cakes in a Chinese cooking show recently.  It was a pumpkin recipes special and it featured this and a steamed variety.  For the steamed one, the cooking host shaped the dough into a little pumpkin and then steamed it until cooked.  She served it with some sort of sweet syrup.

I was attracted to this pan-fried version as it looked really tasty.  What's more I am also a big fan of sesame seeds so of course I had to give this recipe a try.  I was also curious of how it would taste like.


I gave it a bite to let you see the texture inside of this cake.  It tasted like nian gao, since it was made of glutinous rice flour I guess.  Slightly chewy and not bad at all.  Mine was not sweet enough, I would prefer it to be sweeter.


Remember to pan-frying it in low heat pan so that you won't burn the sesame seeds.  Sesame seeds burn easily in high heat.

Before pan-frying


Method:

Pumpkin,  cut the skin off, cut into half, seeded and save the seed to roast.

Cut pumpkin into slices.  Steam for 30 minutes or until soften.  Mash with a fork. Squeeze out the juice. Mix in some brown sugar, stir well.  Then add some glutinous rice flour until a dough is formed.  In a plate, spread out the white sesame seeds.  Roll the dough into a cylinder shape, cut and slightly roll it flat with your hand.  Coat both sides with sesame seeds.  Pan fry in low heat until golden brown on both sides.  Drain on paper towel.  Serve.

2 cups smashed pumpkin , 3/4 cup (less sweet)  to 1 cup of brown sugar (sweet).  I only used 1/2 cup of brown sugar and it was not sweet at all.  I think the original recipe was made without adding any sugar.


Friday, October 29, 2010

Green Tea Pumpkin Seeds


I always wanted to roast some pumpkin seeds.  My opportunity came when I had a bag of pumpkin seeds given by a library event (pumpkin carving) that we went to.  I loved green tea flavor and so automatically I wanted to try green tea flavored roasted pumpkin seeds.  This is definitely good and make a great snack.  Me and my girls all loved it.

Since this was slow roasted for an hour, we can certainly pop the whole thing in the mouth.  It's totally edible with extra fiber and crunch.  You can taste the green tea and salt.  Of course if you choose to just eat the seed, you can do that too. I did that while watching my korean drama.  LOL!


Ingredients:

1- 1 1/4 cup whole pumpkin seeds (cleaned, remove pulp and strings, wipe with paper towel and let dry)
1 Tbsp. canola oil
1/2 Tbsp. Kosher salt
1 tsp. green tea powder or matcha

Method:

1.  Preheat oven to 275'F.  Line a baking sheet with aluminum foil.

2.  Mix the ingredients in a bowl and spread it on the foil lined baking sheet.

3.  Bake for 1 hour, stirring occasionally.  Let cool and store in an air-tight container.

(Double the recipe for 2 cups of pumpkin seeds)

Tuesday, August 3, 2010

Water Chestnut Jelly Cake


If you have been reading my blog, you probably aware that I did this before but the plain version.   With the yellow rock sugar that I used, my water chestnut cake turned out white, not the result that I was looking for.  So, this time I played with the recipe and used Malaysia's Gula Melaka and added the chopped water chestnuts.  It turned out so much better, love the fragrant of Gula Melaka that I could taste with each bite as well as the added crunch from the water chestnuts.  It is really refreshing eaten it cold straight from the refrigerator.  I prefer this instead of pan-frying it with batter, less grease thus healthier.

This will be the way I am making this in the future until I am out of the Gula Melaka, then the other substitute that I could think of will be the Chinese brown sugar in bar shape.  That would give me the color that I want but with different fragrant.


Ingredients:

250g water chestnut flour (馬碲粉)
500ml water
1 5oz (141g) canned of diced water chestnuts
750ml water
350g  Gula Melaka

Method:

1. Open the canned of diced water chestnuts, drain, lightly rinse and chop into desired pieces.
2. Mix water chestnut flour with 500ml water and whisk to mix well.  Set aside.
3. Boil Gula Melaka with 750ml water until sugar dissolve. Add in the chopped chestnut pieces.
4. Pour water chestnut mixture into Gula Melaka solution and keep stirring until it turns transparent and thick.
5. Pour the thicken chestnut mixture into a well greased 8 inch pan.
6. Steam on high heat for 30-45 minutes.
7. Let it cool at room temperature and then cover with a plastic wrap and keep in the refrigerator for at least three hours.  Preferably overnight.
8. Slice and serve it cold.


Sunday, March 21, 2010

Delicious Chocolate Banana Cupcakes


I had to put delicious up there in the title because it was delicious.  I used my marbled banana chocolate cake recipe and made it into chocolate banana cupcakes.  I invited few friends for a play date and decided to make something for coffee/tea in the afternoon.  I made this along with some chocolate chips cookies and I just realized all my snack have chocolate chips in it!

The cupcake was soft, moist, chocolaty and tasted like banana.  Truly delectable!  I added chocolate chips because my girls loved them.  I had to stop them from eating more because this was meant to be shared. ;)  At the play date, I noticed that all the kids would pick out the chocolate chips to eat first, my girls included. :)  If you like my recipes, put this on your to-try list, you won't be disappointed.


I saw this butterfly silicon cupcake cups at Target and had to buy it, it was 6 for $1 at the Dollar section, how cheap.  It was so cute too and I regretted I didn't pick up the flower silicon cups for the same price, as when I went back, it was all gone. :(  I guess you paid for quality too, this had some broken pieces and the silicon was pretty thin, but it's usable.


How it looked from the bottom. 

Ingredients:

(A)
1/2 cup + 2 Tbsp. sugar

1/4 cup canola oil (or vegetable oil)
1 large egg

1/4 cup milk (I used 1%)

2 bananas, smashed (I used frozen)


(B)

1 cup all-purpose flour

1/4 tsp. baking soda

1/2 tsp. baking powder

1/4 tsp. salt


(C)
1/2 cup semi-sweet chocolate chips, melted (microwave [900watt] for 1 min 40 seconds) 


Extra chocolate chips for decoration (optional)


Method:

1. Preheat the oven to 350'F. Line a baking pan with silicon cupcake cups or line some paper cups in muffin pan. Set aside.


2. In a big bowl, hand whisk together (A). Add in (B), whisk until well blended.


3. Add in (C) and whisk to combine.


4. Use a big spoon and scoop some of the batter into the silicon cups, slightly less than 3/4 full.
  Place some chocolate chips on top for decoration (optional).

5. Bake for 20 minutes or until a bamboo stick inserted in center comes out clean.


6. Cool on wire rack and store in air-tight container.


Wednesday, February 17, 2010

Bak Kua (Chinese Pork Jerky)


Bak Kua, my all time favorite when I was a kid and now too.  Love to sandwich it in bread and have it as breakfast.  This is also one favorite for Chinese New Year, people give this as gift in Malaysia.  They also served this for people who visits their houses.  When I moved here, bak kua was non-existence.  All I found that was similar to this is American beef jerky which I couldn't stomach.  Then, four years ago, I found a very easy bak kua recipe shared by a fellow blogging friend.  I tried it and loved it and have been making it all these years.


This recipe is so easy to make and trust me it is really good.  The above has about 1lb. of ground pork, I thought I might be able to share with my friends until my hubby spotted it.  He never dared to try the bak kua I made all these years (he thinks it was yucky so more for us) and suddenly he came and grabbed a piece to try and kept coming back for more and more.  Needless to say, any food that he set his eyes on, will be gone in no time.  He only left few pieces for my girls and I.

Thursday, January 14, 2010

Vietnamese Fried Springrolls (Cha Gio)


We loved Vietnamese fried spring rolls (Cha Gio). I loved the texture and crispiness of fried rice paper, it added a touch of difference from the usual fried Chinese spring rolls or egg rolls. It was quite pricey to order it in a restaurant as it costs about $2 a piece. So, I decided to make it at home. I got to put more ingredients in my filling as usually what we got at a restaurant was filled with minimal ingredients. It was definitely a treat but I hated that my hair smelled of fried oil afterward.


Ingredients:

(A)
Ground Pork
Wood ear fungus, soften

Carrot, shredded

Green onion, chopped

Glass vermicelli, soften in hot water, cut

Fish sauce

Sesame oil

Salt

Black/ white peppers

A touch of sugar


Vietnamese rice paper

Oil for deep-frying


Filling before wrapping.

Method:

1. Mix (A) together in a bowl. Let it marinate in the refrigerator for at least an hour.


2. Soften the Vietnamese rice paper in warm water, place filling on it and wrap it up spring roll style. Set aside and finish the rest.


3. Heat up oil in a wok. When hot, turn the heat to medium and deep-fry Cha Gio in batches. About three at a time and be careful not to let it touch each other as the skin would break. Deep-fry until golden brown in color, drain on paper towel.


4. Serve with Thai chili sauce, or Vietnamese Nuoc Cham (sweet vinegar sauce).


Note: 
1)  I read that by adding a little sugar in the warm water to soften the rice paper will help the rice paper to brown evenly when deep-frying.
2)  Adding an egg or two in the filling might help the rice paper to remain crispy, the filling has to be dry so that it won't create moisture when fried and soften the rice paper.


Monday, January 11, 2010

Baked Chickpeas/Garbanzo Beans


I love this canned chickpeas, it provides such a convenient for me. I have since used it in stir-fried, my version of Japanese curry and baked it as snack. Sharing with you the crispy snack version. You can create your own seasoning mix for the chickpeas as well. A healthy and easy snack for your afternoon.


Ingredients:

1 canned of chickpeas/ garbanzo beans
Olive oil

Cumin powder

Paprika

Fennel seeds powder

White sesame seeds

Sea salt


Method:


1. Washed and drain chickpeas in a colander. Spread them on a baking sheet and pat dry with paper towels.

2. Sprinkle some olive oil (or extra virgin olive oil) on top, add some cumin powder, paprika, fennel seeds powder, sesame seeds and sea salt to taste. Mix them well with your hands and spread evenly on the baking sheet.


3. Preheat 400'F oven. Bake for 30 minutes, stir them at 15 minutes. Turn oven to broil (500'F) and broil for 3-5 minutes or until crisp.