skip to main |
skip to sidebar
I bought a can of red bean paste the other day and thought of giving it a try. It's a fat free red bean paste from China, fat free because no oil was added, just water. Thus, I made red bean buns for breakfast.
 This time I brushed the top with egg wash, that's why it has the golden shiny look.
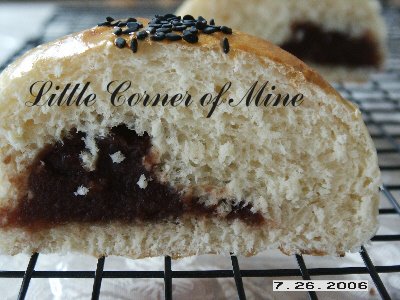 Guess I'm still not very good at shaping filling inside the bun. But to my surprise, the fat free red bean paste actually tasted pretty good. Smooth and sweet, what's more, it's fat free!! So, feel a little guilt free while eating these buns. Now, I don't have to make my own red bean paste anymore. Hehe...can just buy it in Denver.My daughter loves red bean too, she would stick her finger in to eat the red bean paste first before finish the rest of the bun. Quite messy if you ask me!
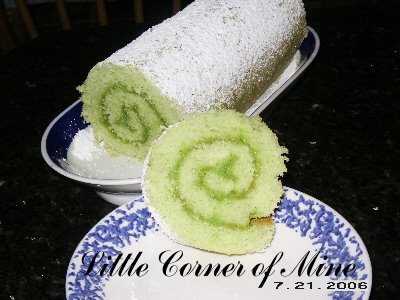
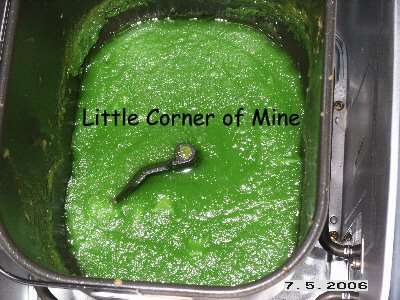
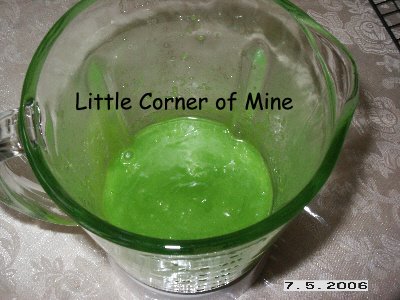
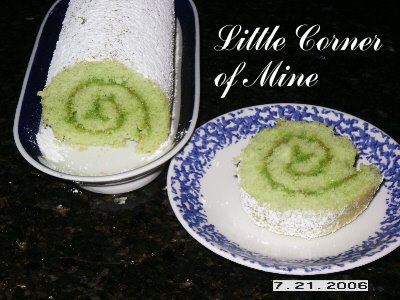 I always want to make some sort of a roll, but just never really got my hands on it. Don't know what happen today, out of the blue I just thought of making pandan kaya roll after I saw a swiss roll picture on the net. Perhaps because I have Pandan kaya ready in the refrigerator and what better way to match it but to make a pandan roll. So, here's my first Pandan Jelly Roll. :)
 Verdict: Soft and Spongy! This is actually easier than making a cake, guess will make it often from now on.Recipe adapted from the cookbook, The Practical Encyclopedia of Baking. Ingredients:3 eggs1/2 cup granulated sugar, plus extra for sprinkling3/4 cup all-purpose flour, sifted1 Tbp. boiling water mixed with 1/2 tsp. Pandan pasteKaya jam for spreadingConfectioners' sugar for dusting (optional)Method:1. Preheat oven to 400'F. Grease a 12x8-inch jelly roll pan and line with parchment paper.2. Combine eggs and sugar in a bowl. Beat with a handheld electric mixer until thick and mousselike. (When the beaters are lifted, a trail should remain on the surface of the mixture for at least 15 seconds.)3. Carefully fold in the flour with a large metal spoon, then add the Pandan boiling water in the same way.4. Spoon into the prepared pan, spread evenly to the edges and bake for 10-12 minutes, until the cake springs back when lightly pressed.5. Spread a sheet of waxed paper on a flat surface, sprinkle it with granulated sugar, then invert the cake on top. Peel off the parchment paper.6. Neatly trim the edges of the cake. Make a neat cut two-thirds of the way through the cake, about 1/2 inch from the short edge nearest you.7. Spread the cake with kaya jam and roll up quickly from the partially cut end. Hold in position for a minute, making sure the seam is underneath. Cool on a wire rack. Dust with confectioners' sugar before serving.
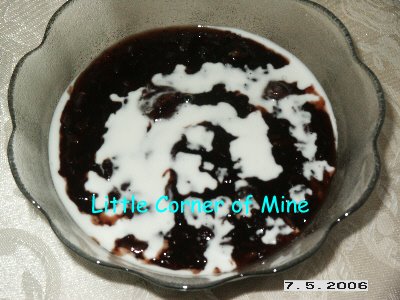
I bought a bag of black glutinous rice months ago thinking of making it but just never got to it. Then, Lily came to visit and taught and showed me how it was done. The below was made by me since hers was finished without taking a picture. I made mine with a little white glutinous rice (Lily's method) to cook the bubur. Then, added dried longans and Gula Melaka (like Amy Beh's recipe). Lastly, top with salted coconut cream to serve.
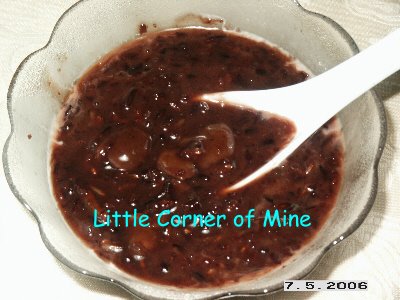 When stirred and ready to makan. If you want the recipe, just go to kuali.com and do a search. Amy Beh got a good recipe there.
Click here to read my latest bubur pulut hitam using a slow cooker (with recipe).
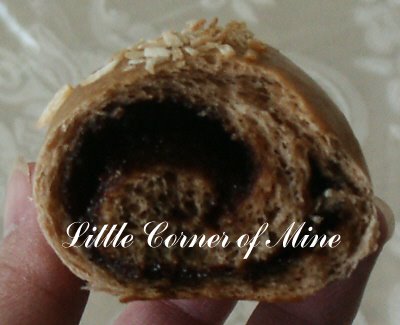
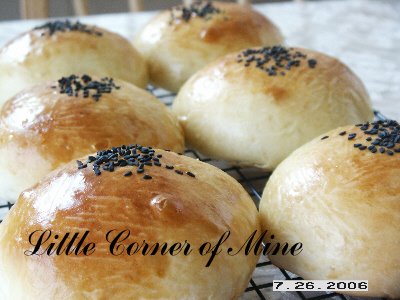
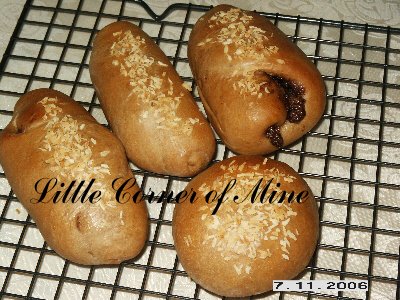 Experiment with Nutella as filling for my chocolate-coffee dough. The top was sprinkled with desiccated coconut.
 What's the inside look like. Excuse the burr picture, hard to take close up.Verdict: Not bad at all! Just like eating bun spreading with Nutella jam. Most important, my daughter who doesn't fancy bread/buns can finish the whole bread by herself, even two at one go. I asked her, "Hao zhi ma?" and she replied, "Hao zhi". Hehe...
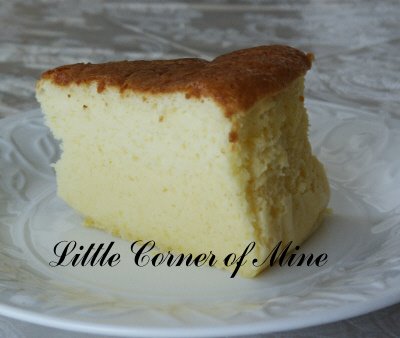
 I just bought a 3 sets springform pan the other day that come with 8", 9" and 10". So, I can finally make some cheese cake from now on. The first thing I want to make is Edith's Jap. Cottony cheese cake. I did make it before (2-3 years ago) using the shallow 9" pie pan, thus my cake won't be able to rise. I remembered that cake was only 1" in height and very flat.
 Not too bad huh? However, I did manage to cook some of the egg yolks while pouring in the still warm cream cheese mixture (no patient to wait til it cool), thus I have pieces of cooked egg yolks at the bottom of the cheese cake. So, for those that haven't tried this recipe and wanted to try, remember to cool your cream cheese mixture first and don't end out like me. :P
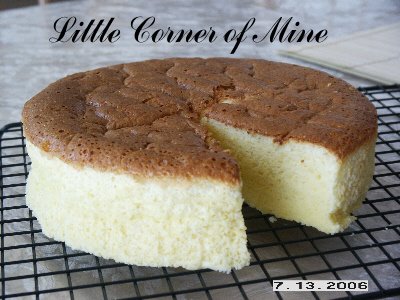 Therefore, I have to cut off the bottom layer. The bottom layer was cut from the above picture. Still look pretty high hor? Like the name said, this cheese cake is cottony soft and not very sweet.Her recipe can be found here
.
Thanks Edith! :)My adapted recipe:(A)1 block 225g (8oz) Philadephia cream cheese1/4 cup butter100ml fresh milk(B)1/2 cup cake flour1/8 cup cornflour6 egg yolks1 Tbp. lemon juice1/4 tsp. salt(C)6 egg whites1/4 tsp. cream of tartar2/3 cup sugar1. Melt (A) in a double boiler, cool.2. Fold in (B) & mix well.3. Whisk (C) until foamy. Add sugar and whisk until soft peaks form. Fold in 1/2 of the mixture into 2, and then add the remaining egg white micture and fold to mix.4. Pour into the tube pan (lightly grease and line the bottom and sides of the pan with greaseproof paper).5. Bake in a water bath (hot) for 1 hr 10 mins or until set or golden brown at 320'F.
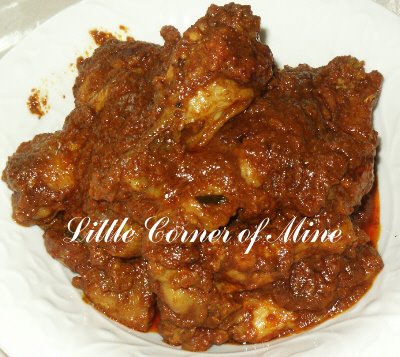
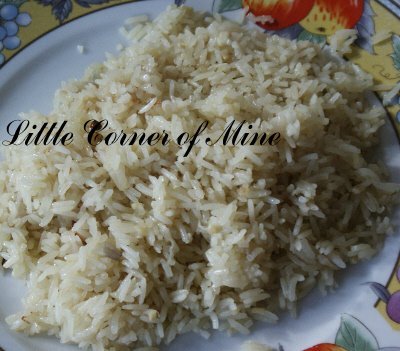
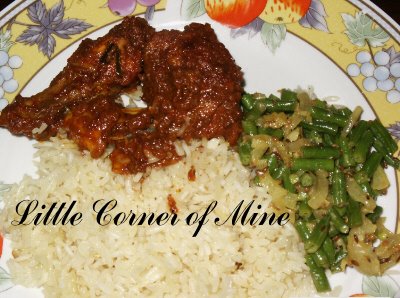
 I have a bag of prawn shells reserved in the freezer to try out cwl's (a KC member) prawn mee recipe. But I ended out with my version of prawn mee instead (lack of ingredients, using my ready-made chilli paste, etc). I think I put too much fried shallots in my stock that it over power the smell of prawn in the stock. Not really happy with my version and the ingredients I put in. Next time have to make it real authentic with just kangkong, shrimps and thin pork slices instead of spinach and added fish balls. I think too much stuff spoiled this delicate soup base.My hubby seem to like it though since he finished the whole bowl including all the soup!! *Shocking*
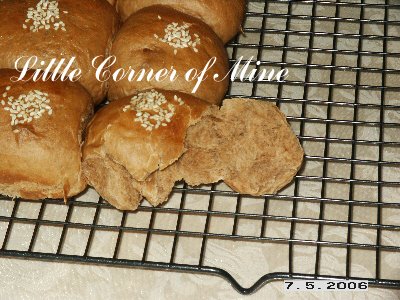
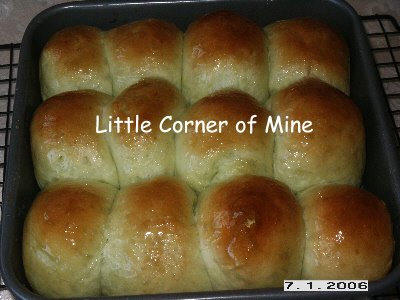
 I'm using the Basic Sweet Buns recipe posted here. The changes I made was adding 2 Tbp. cocoa powder, 1/2 tsp. coffee emulco and 10ml strong instant coffee liquid. I brushed the top with milk and sprinkled with white sesame seeds before baking.
 Soft and satisfying buns with a hint of coffee and chocolate flavors, very nice with my morning cup of coffee.
For Pei: Basic Sweet Bun Dough recipe by Gina from Kitchencaper:2 3/4 cup bread flour1 cup plain flour1 tsp. bread improver1 tsp. salt1 Tbp. milk powder1 Tbp. instant yeast1/2 cup sugar1 egg220ml cold water1 tsp. pandan paste (I added)1/3 cup butter1 tsp. bread softener (optional)Method (My way):1. Add everything in according to your breadmaker manual. Turn on the dough function and let the breadmaker do the work.2. When done, take the dough out, give it a few kneads and cut it and shape it whatever you like. For the above bun shape, roll the dough in cylinder shape, cut out individual portion, roll it into ball and place it on a square or circle baking pan lined with parchment paper.Note: You can add any filling you like at this point as well.3. When finished placing the balls of dough in the baking pan, leave some space in between for it to proof. Cover with plastic wrap and let it proof for 45-60 mins depending on the temperature of your room (or double in size). It is faster if you let it proof under the sun.4. When double in size, brush the top with milk or egg wash (sprinkle with sesame seeds if you like) and bake in the preheated 375'F oven for 10-12 mins. Or until golden brown on top. When warm from the oven, brush the top with some honey/maple syrup (like my picture above) to give it some shine.5. Cool on wire rack and can be kept in the air-tight container and stay soft up to 4 days.The variety of buns you can make from this is endless, try plain buns, green tea buns, chocolate buns, cinnamon buns, strawberry buns, mixed colors buns, etc. Happy baking and experimenting!! :)