Showing posts with label Jam. Show all posts

Monday, August 29, 2011

Pear Preserves


I sampled a pear preserves at my friend's house and really liked it.  Since Barlett pear is in season now, I would love to make it myself.  I did a search on the web and found some recipes at cooks.com.  It gave me a general idea of how it was made.  What I liked best about this preserves is no pectin required.  For my recipe, I used less sugar (as I found the American version was too sweet), added some ground cinnamon and made it in my bread maker.  Direction for stove top is provided as well for those who don't own a bread maker.


Both my girls loved it.  We spread it on crackers and toasted bagels.  Yummy!  I even used it to make cake.  The recipe for Pear Preserves Cake will be coming up soon!


Juices came out when left overnight, ready for the bread maker.

Ingredients:

5 Barlett Pears, peeled, cored and sliced thinly
3/4 cup white sugar (you can reduce the sugar to 1/2 cup if you prefer it less sweet)
2 tsp. lemon juice
1/2 tsp. ground cinnamon

Jam preserves done by the bread maker.  This was the result of the 2nd cycle.

Method:

1.  In a glass container, add in pears, sugar, lemon juice and ground cinnamon.  Stir to mix well.  Covered and let it sit overnight in a refrigerator.  

2.  On the next day, pour it into a bread maker with jam function and turned it on.  I did it twice (ran two times).  Store into a glass bottle and put into the refrigerator.  It will thicken some more while in the fridge.

3.  If you don't have a bread maker, you just pour 1 into a pot and simmer on stove top until the juice has thicken (like honey consistency), about 2 hours.

4.  Yield about a full jar (I used a large jar so it only shown half).  Refrigerate for up to 2-3 months.  Or place in a freezer bag and freeze indefinitely. 

Monday, June 4, 2007

Brown Sugar Kaya


I decided to experiment with my food again. Instead of the Pandan Kaya that I normally made, I tried my hand on the brown sugar kaya. The color of this kaya is quite yucky isn't it? LOL!

I used the same recipe just omitted the pandan extract and substituted the sugar with brown sugar and put everything in my breadmaker. It turned out in clumps and liquid separated, unlike the nice texture I got from my pandan kaya. Don't ask me why because I have no clue, thus I have to blend everything in a blender and turned out like the above.

Tastewise, it was like kaya with the fragrant of brown sugar (I did cut down on the sugar), not too bad at all. But I just dislike the color of this kaya, not appertizing looking at all. Guess next time I better stick with my pandan kaya. :P Or if I brave enough, I might experiment it with white sugar without the pandan extract and see what color it would produce. Hehe...

Thursday, July 6, 2006

Pandan Kaya by Breadmaker

Yeah... I finally made the Pandan kaya using my breadmaker!! My adapted recipe can be found here. Used to make it by hand and had to stand on the stove for at least an hour +. Now, no more standing and stirring for my kaya. :)

Just follow the direction in the recipe and then sifted twice before adding it in the breadmaker and turn the menu to jam function and let it does the work.


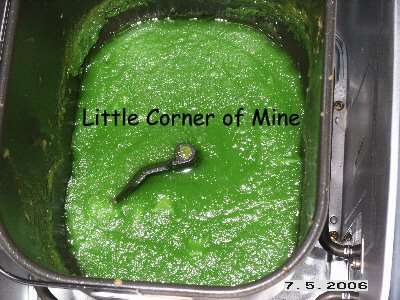
When the kaya was done by the breadmaker.


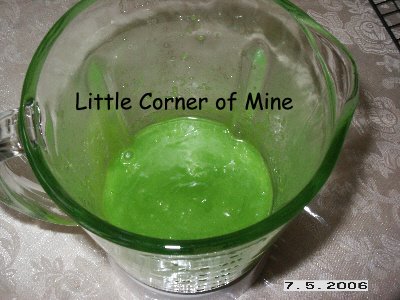
Pour the kaya into a blender and blend until smooth.  This is an optional step, it depends on how smooth you like your kaya or prefer it to be more original.


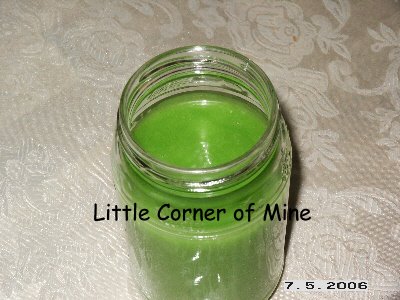
Then, store in a glass jar and in the refrigerator. Should be able to keep in the refrigerator for up to a month. This is a good kaya recipe, yummy indeed!

Thursday, July 21, 2005

Pandan Kaya


~Yield one medium jar, adapted from Jo's recipe.

Ingredients
----------------
3 large eggs
1 1/3 cup sugar
300 ml thick coconut milk
1/2 tsp. pandan paste

1. In a bowl, lightly beat the eggs. Add sugar and whisk until sugar dissolved. Add coconut milk and pandan paste. Mixed well.

2. Sieve kaya mixture into a stainless steel saucepan (twice) and place on stove top over medium heat and stir occasionally with a whisk until mixture started to thicken. Scoop out any bubbles that formed while whisking. Switched to low heat and stir continously until kaya reached the desired thickness or consistency. Remove from heat and cool completely before storing in a glass jar. Refrigerate afterwards. Kaya will be thicker when it's cool and even more so when refrigerated.

~Will produce a smooth kaya.